|
 Collect
and Save Some Heirloom Vegetable Seeds Collect
and Save Some Heirloom Vegetable Seeds
By Melinda Myers
[October 11, 2025]
Be a part of
history and save money when planting next year’s garden. Collect and
save the seeds from your favorite heirloom tomatoes, peppers, beans
and peas this fall.
Seeds of heirloom plants have been collected and passed along for
generations, producing offspring identical to the parent plant.
Hybrids on the other hand involve crossing different plants to
create a unique or improved variety. Saved seeds from hybrid plants
do not grow into plants with all the same characteristics as the
parent plant. |
Heirloom peas and beans are generally self-pollinated, so they form
seeds that will grow into plants like the parent plant. Allow the
peas and beans you plan on saving to dry on the plant. Once the pods
turn brown and the seeds rattle inside, they are ready to harvest.
This is about six weeks after you harvest snap beans for eating and
about four weeks after the normal picking stage for peas.
Protect plants from frost or pull them out of the ground and hang
them in a cool dry location, so the pods can finish drying if
needed. Remove the pods from the plants, spread them out and allow
them to further dry indoors for about two weeks.
Remove the seeds from the dried pods, store in an airtight opaque
container in a cool dark location. You may want to store different
varieties separately in paper packets and all the packets in one
large airtight container. Label the seeds with the varietal name and
date they were collected. Store in a cool location.
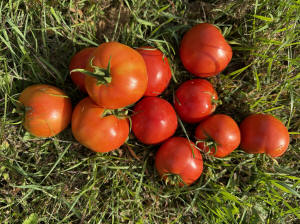
Saving seeds from tomatoes requires a bit different preparation.
Once the fruit is fully ripe scoop out the gelatinous center. Place
this in a container of water set in a warm location to ferment.
Swirl or stir the contents twice a day. After about a week the good
seeds will sink to the bottom of the container.
Remove and compost the layer of fermented tomato waste and the
inferior seeds floating on the surface. Pour the remaining water and
the good seeds sitting on the bottom of the container through a fine
mesh strainer. Rinse the seeds, removing any of the gelatinous
material that may remain. Spread the seeds on a piece of paper to
dry.
Once dry, place the seeds in an envelope labeled with the date and
variety and set in a sealed jar or plastic container. Store in the
refrigerator or other consistently cool location until it’s time to
start them for next season.
[to top of second column] |

Use your saved seeds the following year for the best results. Then
repeat each season.
Start with these and then consider trying other open-pollinated
vegetables, flowers and even tree and shrub seeds. You’ll find
helpful information in books, online and on the Seed Savers Exchange
website. Saving your own seeds can help you save money while
preserving and planting a bit of gardening history.
Melinda Myers has written more than 20 gardening books,
including the Midwest Gardener’s Handbook, 2nd Edition and Small
Space Gardening. She hosts The Great Courses “How to Grow Anything”
instant video and DVD series and the nationally syndicated Melinda’s
Garden Moment TV & radio program. Myers is a columnist and
contributing editor for Birds & Blooms magazine and was commissioned
by Summit for her expertise to write this article. Myers’ website is www.MelindaMyers.com.
[Photo courtesy of MelindaMyers.com]

|